You need to know the basics of how to capture the night sky in order to take great Milky Way photos. This includes high ISO. You can also use high ISO to photograph the Milky Way. This guide should provide all the information that you require. Enjoy the ride.
For milky way photography, high ISO is vital
Although you could try the automatic exposure function of your camera to capture images of the milkyway, it is not always possible. In such cases, it is important to use high ISO, which will increase the sensitivity of your camera's sensor. High ISO works well with large apertures for milkyway photography. You can use f/2.8 for best light gathering.
You should also set the ISO on your camera to high to prevent any pixel noise from appearing in the picture. High ISO allows for sharper shots in milky way photography. PhotoPills also has a hyperfocal distance calculator that will help you determine the optimal exposure of your subject to achieve the best images. You should also shoot in RAW to capture more details in the shadows and highlights of the photo, making it easier for you to post-process the image.
Wide angle lens
A wide angle lens is an excellent way to capture large expanses or the Milky Way. You can capture a whole sphere of space with wide lenses without worrying about the depth. Because it has a large field-of-view, wide lenses can provide more detail. You should also learn how to properly use the lens.
You must first decide on the aperture that you would like. A wide aperture is necessary to capture the maximum amount of light. Nightscape photography is often done with wide aperture lenses. But, it is best to choose one that has the highest f/number. These lenses are excellent for milkyway photography but have some drawbacks. Although the Nikon f/2.8 GM lens is cheaper than the Sony 14mm f/1.8 GM lens, they are not as fast.
Manual shooting mode
Manual Mode is best for Milky Way photography. The accuracy of the lightmeter on your camera decreases as the night sky darkens, so you must manually adjust the camera settings. To improve the color of the Milky Way's Milky Way, you could use a white-balance adjustment or a radius gradient. RAW can be used to shoot images that allow for more precise adjustments in post processing.
Another option is to use program mode. This mode allows you to adjust the ISO and exposure. This mode is a good transition between automatic and manual modes. This mode gives you full control over the exposure of your camera. You can adjust the exposure settings and depth of field. This mode is great for moving subjects. You can change the ISO and try experimenting with different exposures. This mode is not recommended for beginners.
Use a front element
There are many options for creating a unique composition for a Milky Way picture. One option is to use the foreground element. This simple technique can create an original image. This technique uses a foreground subject to stand out. It can be used alone or in combination with the Milky Way. Although the Milky Way is the main subject, your foreground should be equally interesting. A tall rock can serve as a perfect foreground subject. A foreground element can be used to break up the image's plane and give a new perspective.
In ideal conditions, the sky will be completely black without any moonlight. To achieve this, disable the autofocus function on your camera. Instead, focus manually with a manual lenses. It is important that you have sharp foreground elements in order to achieve stunning images. You can then use the focus rings to focus on Jupiter, the brightest star, if possible.
FAQ
How can I learn photography on my own?
There are many different ways to learn how take great photos. You could buy a book, attend a class, join an online community, watch YouTube tutorials, etc. If you really want to learn how to take pictures, it's best to do it yourself. So you can decide what goes into each picture. And you'll continue to improve as long you keep learning.
Digital photography doesn't require expensive equipment. All you need is an internet connected computer and a camera. The rest is up to you.
Here are some ways to get started.
-
Make sure you are familiar with your camera’s manual settings.
-
Learn how to use the basic controls.
-
Photograph lots.
-
Edit them.
-
Share them.
-
Keep practicing.
-
Experiment.
-
Try different angles and perspectives.
-
Use light sources creatively.
-
Practice makes perfect.
-
Be willing to fail.
-
Be patient.
-
Have fun
Which Lenses Are Best?
The most common question beginners ask is, "what lens should I buy?" This is a difficult decision because there are so many options.
The good news? You don’t have to purchase a completely new lens for every new camera you buy. Instead, you can buy additional lenses later.
There are three types possible lenses.
-
Wide Angle Lens (14mm to 24mm): These lenses allow you to see more of your subject from a wider angle. You can zoom in to improve image quality.
-
Standard/Normal Zoom Lens (28mm-70mm): These lenses let you change the focal length while still maintaining excellent image quality.
-
Telephoto Zoom Lens (70mm-200mm): These lenses can be used to capture distant subjects. They allow you to focus on your subject despite the fact that they may seem small in the frame.
Combining lenses can create different effects. To capture close-up details, you can switch between a normal and telephoto lens.
Photography is a great job.
Photography allows you to record moments in time and share these with others. If you are willing to work hard, photography can be a great way for you to make money. If you want to become a professional photographer, there are many ways to do this. Start by taking photos for your friends and family as a hobby. This will allow you to build confidence and improve your photography skills. Once you have successfully completed this stage, it is possible to move on with paid assignments. Photographers who are the best earn a living doing what they love. They might accompany clients to parties or weddings, where they have to capture images that show people having fun. But most professionals prefer commercial work such as advertisements or product shots.
The key to becoming a successful photographer is to find out what type of photography you enjoy. Continue to practice, experiment and learn new techniques until your skills are perfected. There is no substitute for experience, so don't expect to succeed overnight.
You should first develop your technical skills before you focus on creativity as a beginner. Photography is both technical and artistic. You will be able to succeed quicker if you learn how to use the right tools, and the basics of composition.
It is important to consider whether you are interested in a full-time career or if you would like to work part-time. Some people combine their passions for photography with other careers. It is possible to work as a freelancer while you are at the local newspaper. Some photographers dedicate all of their spare time to photography. You have to put in the effort and be committed to any creative endeavor.
If you're serious about making a career in photography, you will need to invest a lot of time and effort. You should think about whether this is something you want to dedicate your life to.
Light Room is a great way to enhance your photos.
It is important to begin early in order to have great photos. It's better to take as much as possible, then select the best.
Lightroom allows you to do this by letting you see how different settings affect each photo. You can adjust these settings instantly without returning to Photoshop. This allows you to quickly experiment with what looks good and what doesn’t.
How can I improve my smartphone's photography skills?
Photography doesn't have to be expensive. Amazing photos can be taken with your smartphone.
It's easy to get started with the software.
Many apps are available for iOS and Android that allow you to easily edit and share photos.
These five tips will help you take better photos.
-
Set Up Your Camera App. Your camera app should already be installed on your device. Download it from Google Play, Apple's App Store or Google Play.
-
Use effects and filters. Effects and filters allow you to alter the appearance of your photos without needing to touch them.
-
Adjust Exposure. Adjusting the exposure can help you control the brightness in your picture.
-
Take the right lighting. Bright light allows you to better see the details of your subject. You can capture highlights and shadows in low-light conditions.
-
Take Pictures Of People. Photographing people can show others what you are most passionate about.
Check out this article to learn how to take better pictures with your smartphone: 5 Tips To Improve Photography Skills
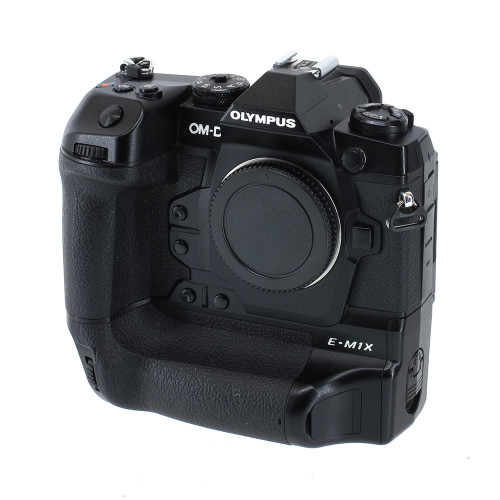
Which is the best camera to use for beginners?
The best camera for beginners depends on your budget, needs, and skill level.
A point-and-shoot camera is a good option if you want to save money. These cameras aren't as versatile as they look, but they provide good quality.
Digital Single Lens Reflex (DSLR) cameras have interchangeable lenses that allow you to shoot various types of shots. These lenses are usually more expensive than point-and shoots, but offer greater flexibility.
A beginner's package is a great way to get started in photography. The package includes everything you need: a camera, lens, memory cards, tripod, flash and a camera body.
Do not forget to get extra batteries!
How can you become a skilled photographer?
Photography is an art that takes patience, dedication and passion. If you love photography, you'll be doing better than if only you were going after the money.
You should learn how your camera works. You need to be able to comprehend composition, lighting, exposure, depth-of-field, and other aspects of photography. Additionally, you should have a good grasp of Photoshop.
It is hard to master photography, but it is worth the effort.
You can improve your skills by reading books, attending classes, and participating in competitions. This will give you experience and confidence that will help you improve. What equipment is required?
It really all depends on what type of photography you enjoy. If you are interested landscape photography, you will need to have a wide-angle zoom lens.
A telephoto lens will be a must if you are interested in portrait photography.
Photographers need a tripod. It allows for you to sit back and compose your image without moving.
Camera bags are useful for carrying your memory cards and other accessories.
If you use a compact camera, a flash unit is required.
For beginners looking to capture professional-quality photos, a DSLR (Digital Single Lens Reflex Camera) is the best option.
DSLRs are great because they let you control every aspect in your photo including shutter speed (aperture, ISO sensitivity), white balance, focus and white balance. These cameras also offer a variety of features, such as autofocus (auto-exposure locking), self-timer bracketing and RAW format.
Statistics
- There are people out there who will pick at flaws they can only see in 100% crops of your photos. (wikihow.com)
- The second easiest way to get blurry photos 100% of the time is to use a cheap filter on the front of your lens. (photographylife.com)
- Get 40% off Adobe Creative Cloud(opens in new tab) (creativebloq.com)
- In this case, 100% of readers who voted found the article helpful, earning it our reader-approved status. (wikihow.com)
External Links
How To
How to take macro shots in photography
Macro photography can be defined as the ability of taking pictures at close range of small objects, such insects or flowers. Macro (from the Greek makros, meaning large) is from the Greek word makros. If your lens has a focal distance greater than 50mm you can photograph objects that are extremely close up.
A macro lens with a good working distance should be able to capture sharp images even when you are not moving too much. Avoid movement when taking photos, as any movement during exposure can blur your image.
Here are some tips to take great macro photos:
-
Use a tripod. Set up a table or chair so you don’t knock anything over. This way, you'll have less chance of moving while trying to shoot.
-
The right lighting is important. Most macro lenses come with built-in light filters, but if you don't have one already, buy one separately. It helps to prevent overexposure.
-
Be patient! Shooting macros takes practice. Even though you might only see one tiny bug or flower at a time, it is worthwhile to continue shooting until you capture it.
-
RAW format is best. RAW files have more data than JPEGs. They can store more detail. Because you can edit the RAW files later, such as cropping or color corrections, they are ideal for editing.
-
It's important to remember the background. The background can be as important as the foreground. Include it in your shot.
-
Keep learning.