It is important to know that timing is crucial when you are taking photos of street art. This article will help you to take street art photos. Continue reading to learn more. This article was written for professional photographers who have been taking photos of street art for many years. This article will share his secrets for taking great photographs. Follow these tips to make your photos stand out.
Timing is everything with street art photography
Timing is everything when you are taking photos street art. Try to get as close to the art as possible without distracting other pedestrians. For example, if you are photographing mosaics, try not to stand too close and focus on the details. These will raise your photographs. Another option is to capture the artwork from an open window or rooftop. Your photos will stand out if you have a unique perspective.
Be patient! Street art photography is slow shutter speeds required and fast composition in order to get the perfect shot at the right time. The scene should be photographed when it is the most dynamic. You will need to wait for cars and pedestrians to pass you, as well as dogs on leashes to move. Changes in weather conditions and timing are important. It is impossible to wait until the perfect moment to snap photos, so you need to be ready for these challenges.
Use a wide-angle prime lens
When taking pictures of street art, you can use a wide-angle prime lens to give your photographs an extra depth and perspective. Wide-angle lenses work great for street art photography because they make subjects appear larger and give the viewer a better perspective of the scene. This is true for objects close to the edges of the frame. A wide-angle lens is a great way to create unique photographs with a story and style.
A prime lens is a great choice for street photographers who are just starting out. This lens allows you to capture candid moments of people or other elements interacted. These pandemonium moments are captured beautifully by wide-angle lenses. Zoom lenses remove the background to make your subject appear like they are being watched. You should experiment with your focal length before you settle on a single focal length.
Avoiding over-processing
If you are a beginner in the art of street photography, the best way to begin is by taking photos of vendors and street artists. But there are some important rules you should follow to avoid over-processing your street photographs. You may feel that certain images require some post-processing. However, this can make them look less natural. This article will cover some of the rules as well as how to avoid over-processing.
Street photography has one primary objective: to tell a story. You should capture the story as well as the emotions of your subject. Also, try to find images that contrast. Contrasting traits can be used to highlight complementary and opposing traits. This will add depth and meaning to your photos. Do not over-process and capture the moment. The results will surprise you. Here are some tips to avoid overprocessing street art photos:
Protecting children
Although street art photography can capture some unique moments, there are common safety tips. You should take into account the age and physical condition of the child or vulnerable adult you are photographing. Many parents are wary of being photographed, particularly if they have children. There are several ways to protect children in these situations. It's a great idea to keep children safe in a safe environment.
You must first get their permission before taking candid photos of children. It is possible for privacy laws to differ from one country to another. For safety reasons, it is crucial to make sure you are familiar with these laws. The environment surrounding street photography is in constant flux for the past forty years. Fear of street photography grew after the trial of a pedophile accused of abusing children in the streets.
FAQ
What equipment do I need to get started in digital photography?
The first thing you should consider when starting out in digital photography is what type of camera you want to use. There are many options: DSLRs (digital Single Lens Reflex Cameras), point-and–shoot compact cameras or camcorders. Each model has its own unique features and advantages. DSLR cameras can produce high-quality images, but they are usually heavier and more bulky than other types. Point-and shoot cameras are lighter and smaller than other types of cameras and can often be set up automatically for certain situations. Camcorders offer excellent video recording capabilities, and may also have still photo shooting modes. Smartphones are small, light, and easy to carry around and offer great image quality and many advanced features such as GPS mapping, music playback, and Internet browsing.
Once you've made a decision about the type and model of camera you want, then you must decide whether you want to buy it new or used. Even if the cameras were bought in the last few decades, they can still be purchased at reasonable prices. Because manufacturers invest large sums of money in developing new technology, new models tend to be more expensive.
Next, purchase lenses. Your photographs' quality will depend on the lenses you choose. They allow you to control the lens's focal length, allowing you to zoom into the scene without losing focus. Some lenses are equipped with flash units built in, while others require external flash units. A wide range of lenses is available from various brands, each offering unique characteristics.
You will also need memory cards. Memory cards save pictures taken with your camera. The size of your memory card will depend on the number of images it holds. It could store hundreds of thousands or even millions of pictures. You will need multiple memory card if you plan on taking many photos.
How can I make my photos look beautiful?
You can look great in photos if you take them yourself. You will learn how to pose, which angles are flattering and which are not. Learn how to use lighting, props and other tools to enhance your natural beauty.
You'll learn how to find clothes that fit and make up that looks great on your skin.
If you're unhappy with the result, we'll show how to retouch your images in Photoshop and other editing programs.
Don't be afraid to take some self-portraits.
Light Room is a great way to enhance your photos.
You can get great photos if you start early. It's always better to take as many shots as possible and then pick the ones that will give you the most bang for your buck.
Lightroom makes this possible by showing you how different settings affect each photograph. These settings can be adjusted on the fly without having to go back into Photoshop. This allows you quick experimentation to see what looks best and what doesn’t.
What is a good camera bag?
Camera bags are essential for protecting your gear during travel. Consider these factors when selecting a bag.
-
You should choose a large bag that can hold your accessories and camera comfortably. Don't purchase more than you are going to use.
-
Durability: Bags made of durable materials such leather, canvas and nylon are best. Avoid using plastic bags or fabric bags.
-
Protection: Make sure that your bag offers protection against dirt, moisture, and scratches
-
Organization: Consider organizing your gear by type to easily access your needs. You could, for example, place your lenses in one area, your memory card in another and your battery charge in yet another.
-
Comfort: Use a shoulder strap to carry your camera instead of a bag. Also, look for a comfortable design with padded straps.
-
Price: Check around to find the best prices. Discounts are sometimes offered by some brands, which can be a bonus.
-
Warranty: Ask if the company offers a warranty on its products. This will ensure that you are able to contact the right person if something happens to your bag.
How can I improve my photography skills on my phone?
Amazing photos are possible with minimal equipment. Amazing images can be captured with a smartphone.
You just have to know how to use all its features and learn some basic techniques.
There are many apps available for both Android and iOS devices that make it easy to edit and share your pictures.
Here are five tips for taking better pictures.
-
Set Up Your Camera App. Your camera application should be already installed on your device. If it is not installed, you can download it from Google Play.
-
Use Effects & Filters. Filters and effects allow you to change the appearance of your photo without having to touch your image.
-
Adjust the Exposure. You can adjust exposure to alter the brightness of your image.
-
Shoot In The Right Light. Bright light allows you to better see the details of your subject. If you shoot in low light, it is possible to capture shadows or highlights in your photo.
-
Take Pictures Of People. You can share the things that you love most by taking photos of others.
For more information on how to take better photos, read our article: 5 Tips to Improve Your Photography Skills With A Smartphone
What is the rule for thirds in photography?
The rule-of-thirds is a simple way to create interesting compositions using no complicated camera settings. It divides the image horizontally or vertically into nine equal pieces. This creates three main areas in which you want your subject. These are the top (upper left corner), middle (center) and bottom (lower right). These areas are useful for positioning your subject in your frame.
The rule of Thirds helps you avoid placing crucial elements too close together. If you place them near each other, they may not have enough space between them to make a strong visual impact. They may lose focus if they're too far apart.
Statistics
- There are people out there who will pick at flaws they can only see in 100% crops of your photos. (wikihow.com)
- In this case, 100% of readers who voted found the article helpful, earning it our reader-approved status. (wikihow.com)
- That's the easiest way to get blurry photos 100% of the time. (photographylife.com)
- This article received 13 testimonials, and 100% of readers who voted found it helpful, earning it our reader-approved status. (wikihow.com)
External Links
How To
What are the requirements to be a good photographer?
For any photography job, you will need to have technical and artistic knowledge as well as business acumen.
Technical knowledge includes understanding exposure, camera functions, lens type, film speeds, and developing techniques.
Understanding composition, lighting, and poses is essential to artistic ability. You also need to know how to use Photoshop and other editing software.
Business acumen encompasses budgeting, scheduling, time management and dealing with clients.
If you want to become a professional photographer, then you should have an interest in photography from a young age.
Learn about photography online, at school or in college.
There are also many books available that teach you all aspects of photography.
Learning about photography is only half of the battle. It is equally important to find your own style.
This will allow your to stand out in this field.
Photography has changed through the years. In the past there were cameras like the Kodak Instamatic camera or Polaroid instant cam.
Digital cameras are becoming more popular than ever. Nowadays, most photographers use smartphones to capture photos.
It is possible to buy a smartphone that takes high-quality images, but if you really want to get into photography, you need to invest in a DSLR (Digital Single Lens Reflex) camera.
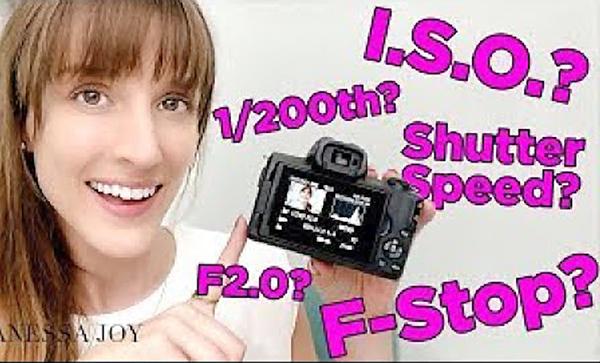
A DSLR can be used to control every aspect, from shutter speed, aperture, ISO, sensitivity, white balance, focus, and white color.
These features make it possible to create beautiful photographs with a variety of effects.
These controls can also be used to alter the mood in your photograph.
For example, you could make your subject appear blurry by using a fast shutter speed.
You can also make the images appear as if they are moving by increasing their light input.
A color temperature adjustment can be used to modify the mood in your image.
You can, for example, increase the red in the picture if you see a lot of blue light. This will give it a warmer look.
It might be hard to decide which direction to point your lens.
Once you get the basics down, it will be easy to see that it's not difficult at all.
It is actually much simpler than you might think.
At first, you might only take landscape shots or close-up photos of objects.
Do not worry! As you gain experience, your ability to capture portraits and abstracts will improve.
After mastering the basics of the subject, you can move onto more advanced topics.
These are some tips to get you started.
-
Pick a great location. Pick a place where you can be relaxed and enjoy yourself.
-
Find something interesting to photograph. Photograph unusual or rare objects.
-
Take plenty of practice pictures. Practice makes perfect!
-
Experiment with different angles. You can hold your camera at different angles depending on what you want to accomplish.
-
Use different lenses. Different lenses offer different perspectives.
-
Photograph in low light conditions. Photography in bright sunlight can be challenging.
-
Practice framing the shot. It is important to practice framing your shot when taking a photograph.
-
Learn how to use your camera settings. Experimenting with your camera settings is the best way for you to improve your photographs.
-
Keep learning new techniques. There are many ways you can learn about photography. Visit local galleries and museums.
-
Read magazines and books. Reading about photography will teach you everything you need to know.
-
Join a club. Clubs for photographers often organize events that encourage members share their work.