Whether you're just starting out in photography or are an experienced professional, knowing the different types of camera filters will help you make the most of your camera. There are many options to choose from for photographers: color filters as well as cooling and warming filters.
Color filters
Color filters can be used on your camera to enhance your photos. They modify the way your camera sees light, making it more selective in what colors it will allow into its sensor. In addition, these filters provide a visual approximation of a color's actual appearance.
Black and white photography can also benefit from color filters. They help increase tonal separation in fine details, such as the color of an object's sky or foliage. They can also be used to darken a color tone.
You can add color to your images by using a yellow filter. It blocks red and blue light, but allows yellow light through the lens. It is a great choice for people with yellow skin under artificial lighting sources and it is especially useful in landscape photography. Its subtle effect makes the filter useful for a variety of black-and-white photography.
You can use red filters to add drama to black and/or white photography. They can help darken blue skies and fluffy white clouds. They can also eliminate haziness in photos. In addition, red filters are useful for creating high contrast black and white photos.
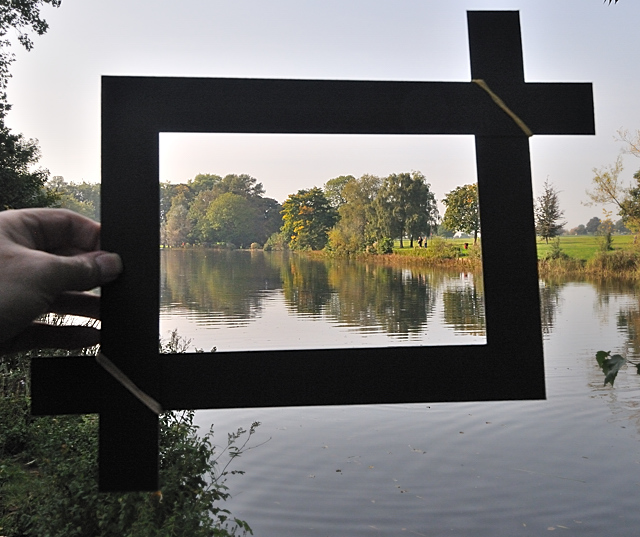
GND filters
ND filters allow for smooth transitions from dark to light. This is done by darkening the top portion of a filter. The bottom part remains transparent.
The ND filters can be used for both motion and still photography. It can be used to create landscapes, sunsets, or sunrises.
When selecting a GND Filter, you should consider the amount of density that you require. Too much density can create a dark sky which is difficult to see in the foreground. The same is true for reflections. Soft GND is commonly used to counter this.
The three-stop GND can balance exposure to make the sky appear less overexposed. This is especially useful when the sky appears too bright.
For smooth transitions between the sky and foreground, a soft GND can be used. This is especially true when you are taking pictures of valley landscapes or seascapes. However, it's not always effective in extreme dynamic range conditions.
Polarizing filters
A polarizing camera filter will increase the brightness and saturation of colors. They can reduce reflections from glass, water, and enhance contrast and whites. But, they can also mess up your sky, making it appear uneven or streaky.
A polarizing filter is made up of at least two layers. The outer layer filters light and blocks reflections. While the inner layer admits more light as the angle decreases the inner layer can focus light. Each layer is different, but all work the exact same way.
To reduce the glare from their photos, some people use polarizing filter. These filters are particularly useful for large bodies water. These filters can also be used to improve the saturation of colors in landscapes. They add texture and flair to images.
They can also be useful in reducing depth of field. Cheap polarizers can be used to add color to an image, but these can be fixed in post-processing. Polarizing filters perform best when used in combination with compatible filtered lens.
Cooling and heating filters
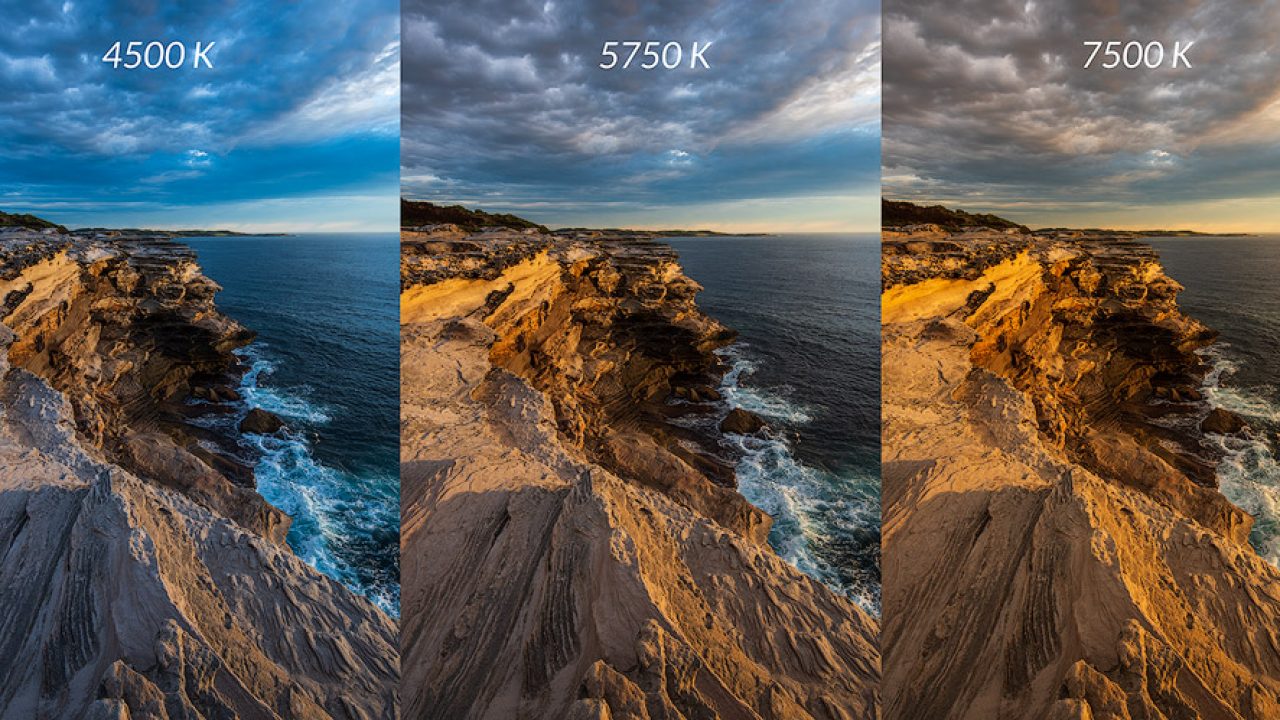
You can change the white balance of your digital camera to make a scene appear warmer or colder. The white balance describes the amount of light reaching your camera sensor. This can be done either by using the white balance settings on the camera or via post-processing.
Warming and cooling filters were used before digital cameras to alter the white balance of light reaching the sensor. These filters made the images more realistic. Digital cameras have rendered these filters obsolete.
Today, most photographers warm and cool their images for aesthetic reasons. You can give a day a warmer look by adding some warmth. Warming and cooling filters are also used to improve color and contrast in images.
Some colors can be enhanced or brought out by colored filters. For example, the skin tones in an image can be enhanced with a colored filter. It is possible to darken the background or add color to the image.
FAQ
Is photography an artistic talent?
Photography is not an artistic talent. It is an art that takes practice, training and experience. It takes years to master any aspect.
Photography is a business, and you should have a plan on how you're going to make it profitable.
This is possible by understanding the client type you wish to attract, and then finding ways to reach them.
You must get to know them and their goals. It is important to communicate clearly and convincingly with them in order to convince them to use your services.
This means that you will need to be well-organized and prepared when you meet potential clients.
When you are ready to approach potential customers, you will need to create a portfolio of your work. You can either create a portfolio digitally with software programs, or print it on paper.
After creating a portfolio you should look for opportunities to present it. You can either approach businesses directly or advertise online.
Light Room is a great way to enhance your photos.
It is important to begin early in order to have great photos. It's better to take as much as possible, then select the best.
Lightroom allows you to do this by letting you see how different settings affect each photo. These settings can be adjusted on the fly without having to go back into Photoshop. This lets you quickly experiment with what looks great and what doesn't.
What is the best camera for beginners?
Your budget, your needs, and your skill level will determine which camera is best for beginners.
For instance, you could choose a point & shoot digital camera if your goal is to save some money. These cameras have a good quality, but they are not very versatile.
Digital Single Lens Reflex (DSLR) cameras have interchangeable lenses that allow you to shoot various types of shots. They usually cost more than point-and-shoots but give you much greater flexibility.
For those new to photography, a beginner's kit is a great place to start. The package includes everything you need: a camera, lens, memory cards, tripod, flash and a camera body.
You should also remember to buy additional batteries.
How can I improve the quality of my photos on my phone
Photography doesn't have to be expensive. With just a smartphone, you can capture amazing images.
All you need to do is to be able to use the features of the program and to master some basic techniques.
There are many apps to help you edit and share your photos on both Android and iOS.
Here are five tips for taking better pictures.
-
Set Up Your Camera App. The camera app should be pre-installed on the device. Download it from Google Play, Apple's App Store or Google Play.
-
Use Filters & Effects. Effects and filters allow you to alter the appearance of your photos without needing to touch them.
-
Adjust Exposure. You can adjust exposure to alter the brightness of your image.
-
Shoot In The Right Light. Shooting in bright light makes it easier to see details in your subject. Photographing in low light conditions allows you to capture the highlights and shadows of your image.
-
Photograph People. It is a great way to share your love with others by taking pictures of them.
Check out this article to learn how to take better pictures with your smartphone: 5 Tips To Improve Photography Skills
How can I make my photos look beautiful?
It is best to take your own photos to ensure that you look good. Learn how to pose and what angles look best. You'll also learn how to use lighting and props to enhance your natural beauty.
You'll discover how to choose clothes that fit well, make-up that looks great on you, and hairstyles that suit your face shape and style.
And if you're not happy with the results, we'll show you how to retouch your images using Photoshop and other editing software.
Take some self-portraits.
Do I Need A Tripod?
This is a question everyone asks. The truth is that a tripod isn't always necessary, but it can come in handy.
It allows you to hold your camera steady when taking pictures at slow shutter speeds. Tripods can be a huge help when you are shooting landscapes or stationary subjects.
On the other hand, if you're photographing moving subjects such as sports or people, using a tripod can cause blurriness. How do you decide which situations are best served by a tripod.
A tripod is an essential tool for photographing fast-moving subjects or stationary objects. Examples include:
-
Sports
-
People
-
Landscapes
-
Close-ups
-
Macro shots
If you're unsure whether you need a tripod, try this test. You can hold your camera still while you look through the lens. A tripod is required if there are blurred lines, movement or other issues.
If you don’t see blurring, adding a tripod is unlikely to make any difference.
Here are some tips for those who do decide to buy a tripod.
-
Make sure your tripod has smooth legs. This prevents unwanted vibrations from shaking your camera.
-
A tripod is a good choice. Some tripods may be made from plastic, which can make them less durable. You should opt for a steel tripod.
-
A remote release is a great option. This remote control lets you remotely control your camera. You can set it to fire the shutter once you press the button automatically.
-
A tripod that can rotate 360 degrees is a good choice. This makes it easier to position your camera vertically or horizontally.
-
Tripods are expensive. Expect to pay between $100-200. You'll still get a lot for your money.
-
Don't forget accessories such as memory cards or filters.
-
Before you buy online, make sure to check your local shops. Many retailers offer shipping free of charge.
-
To find out what customers think about a product, read reviews.
-
Ask friends and family members who own similar products.
-
For customer feedback, visit message boards and forums.
-
You can search online for reviews from other users.
-
Amazon.com offers the ability to search for prices and view customer feedback.
-
Browse photo galleries to get an idea of what photographers do with their tripods.
Statistics
- This article received 13 testimonials, and 100% of readers who voted found it helpful, earning it our reader-approved status. (wikihow.com)
- While I cannot prove that all of those spots were not sensor dust, the photo was taken during a heavy snowstorm…so I guess that 99.8% of the spots are snowflakes. (bhphotovideo.com)
- In this case, 100% of readers who voted found the article helpful, earning it our reader-approved status. (wikihow.com)
- By March 2014, about 3 million were purchased monthly, about 30 percent of the peak sales total. (en.wikipedia.org)
External Links
How To
How to take photographs in low lighting conditions
Low-light Photography is when you take photos in dimly lit or dark environments. It requires special equipment. The main challenges in this field include controlling exposure, whitebalance, and sharpness. Low light photography can be divided into two categories: ambient and flash. Flash photography works best when there's enough light around. You will need a flash if you don't have enough natural light. You might need a flash if your subject is outside but indoors. You can also shoot at night when the moon is shining. You'll be able to capture beautiful colors and shadows this way. Another option is taking photos at twilight. Twilight is when the sun sets but there's still daylight.
Also, you might want to try long exposures. Long exposures can be used to capture images even if the shutter has been closed for several minutes. If the shutter is closed, the camera records only the light that falls onto the sensor. This light will continue to fall onto your sensor after a long exposure. But, the shutter remains closed and no new light enters. As a result, you see very little movement. To ensure a clear image, you should turn off all automatic settings such autofocus or exposure. Make sure to adjust the ISO setting before starting to shoot. An ISO setting of 200 gives you more flexibility to control how bright or dark your image looks. Finally, when you're ready to take the shot, press the shutter button quickly. This will cause the shutter to close completely. Keep the shutter button pressed down until the last second. You will prevent additional light from entering your camera by keeping the shutter button down. Once you have taken your picture, wait for a few moments before you release that shutter button. This will allow the camera to process your image. While your image processing is taking place, you will be able to view your photos on your screen. Once you are satisfied, save them on your computer.