You can learn a lot about composition by subject isolation photography. It will help you become skilled at capturing beautiful images. This effect can be achieved using several techniques such as specialized lenses and camera settings. Here are some tips: Make sure that you have a good knowledge of the subject and that you are shooting in a neutral setting.
Long focal lengths
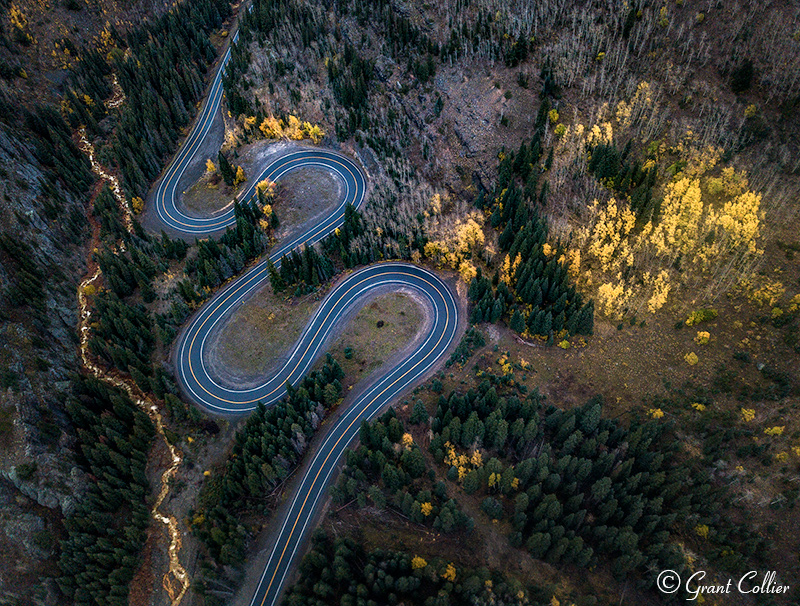
Your photography will be more successful if you choose a long focal length. This will help you separate your subject from its surroundings. The longer your focal length, the further you can zoom into the scene and eliminate distracting elements. Long focal lengths reduce the background, making it easier to focus on your subject and create a clean frame. 100mm is a good focal length for isolation photos.
Although you'll lose depth of focus and have a longer focal length with telephoto lenses, you'll get better results. When choosing a lens for a scene, remember that it is important to select the best one.
Contrast
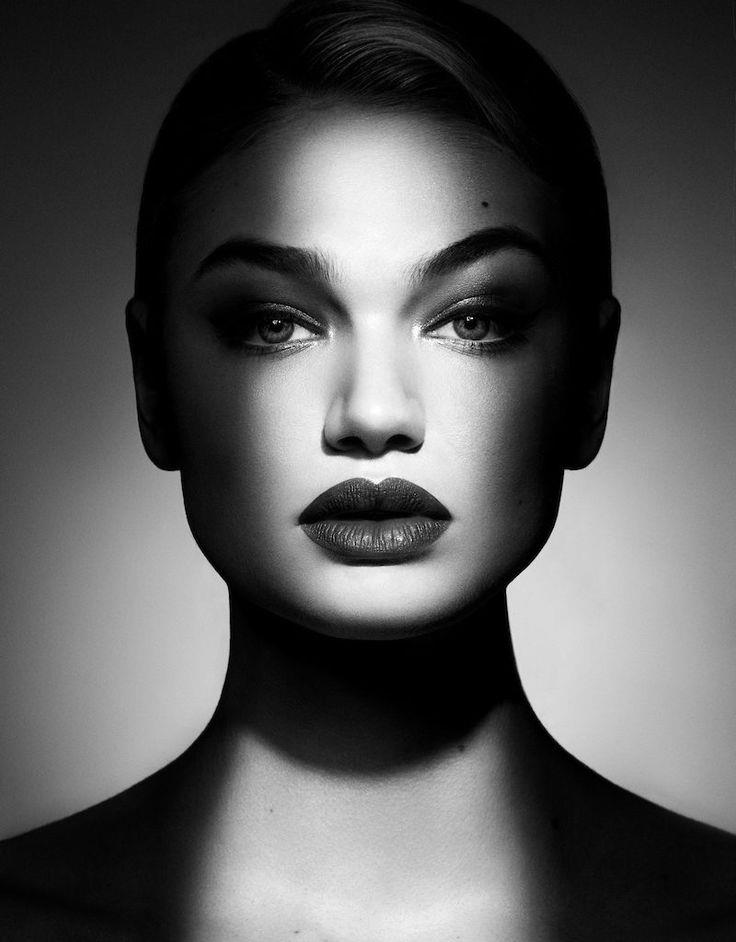
Isolation photography is all about contrast. You can use contrast to separate your subject from the background. The background can also be blurred by widening the aperture. This method will result in a shallow depth of field and a focus on the subject.
Contrast is a way to make your subject more interesting and helps shape it. It's particularly helpful for portrait photography, where the focus is on the subject rather than the surroundings. Portraits should be focused on the subject. Increasing the size of the subject will help the viewer focus more attention on it.
Side and back lighting
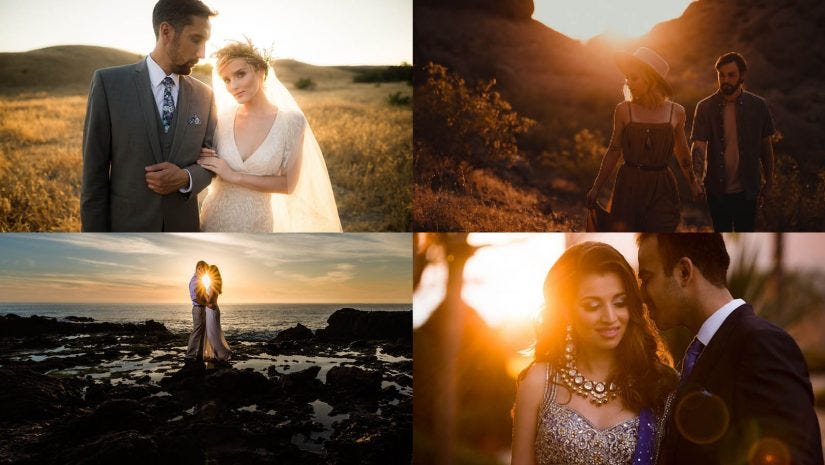
If you are photographing an object alone, side and back lighting can help enhance the image. It can also create different moods. It's especially useful for photographing objects that have shiny surfaces. In these situations, there is less reflection from shiny surfaces which helps to define the object’s shape. This lighting method is not as common, but it offers several advantages.
Side light helps isolate the subject from the background and draws the viewer's eye to it. Here, the boys are lit from the side and behind, while the background is darkened and blurred. A break in the tree canopy between them and the viewer draws attention to the subject.
Shallow depth of field
One of the most effective ways to achieve shallow depth of field in your photography is by using a small f-number. This will allow more light in the photo, allowing the subject to be in focus. In addition, shallow depth of field creates a blurred background. You can also achieve a shallow depth-of-field effect by using fast shutter speeds. It is essential to learn how to use your DSLR camera’s settings to create the desired effect.
Shallow depth of field is the easiest way to isolate your subject. This will simplify your background and foreground by decreasing their importance. It can create beautiful blurring effects around your subject. A wide aperture can be used to soften the background while deemphasizing the foreground. This minimalistic scene will draw attention to your subject.
Pattern recognition
The most important component of isolation photography is pattern recognition. It allows the photographer identify a subject by minimizing foreground and background elements. This technique has numerous applications, including image processing and speech recognition. It can also be used to accurately identify faces in a photograph, which is an important function for security systems.
Pattern recognition is the ability to identify similarities between two items. This involves constant comparisons and the identification of patterns. It is possible to spot patterns in large amounts of data. Pattern recognition must fight the effects of entropy and homeostasis, which can lead to ecological devastation.
FAQ
Is photography an artistic talent?
Photography is not an artistic talent. It is an art that takes practice, training and experience. You need to practice for years before you can master any part of the craft.
Photographing is a business that requires a plan.
You need to know what type of clients you are looking for and how you can reach them.
You must know their identity and what they want. It is important to communicate clearly and convincingly with them in order to convince them to use your services.
You will need to be organized and ready for any meeting with potential clients.
To be ready to meet potential customers, you'll need to build a portfolio. This can be done electronically using software programs or printed on paper.
Once you have compiled a portfolio of work, you should start looking for opportunities to display it. This could mean approaching businesses directly or advertising online.
What camera is the best for beginners, and why?
Your budget, your needs, and your skill level will determine which camera is best for beginners.
You might consider a point-and shoot digital camera if you are trying to save money. These cameras aren't as versatile as they look, but they provide good quality.
Digital Single Lens Reflex (DSLR) cameras have interchangeable lenses that allow you to shoot various types of shots. While they are more expensive than point and shoots, they offer much more flexibility.
For those new to photography, a beginner's kit is a great place to start. The package includes everything you need: a camera, lens, memory cards, tripod, flash and a camera body.
Don't forget to buy extra batteries too!
Is digital photography hard?
Digital photography can be difficult. Learning how to properly use the tools takes effort and time. You need to know what settings to use for different types of shots. Experimenting is the best way of learning. Practice makes perfect.
Statistics
- There are people out there who will pick at flaws they can only see in 100% crops of your photos. (wikihow.com)
- This article received 13 testimonials, and 100% of readers who voted found it helpful, earning it our reader-approved status. (wikihow.com)
- Get 40% off Adobe Creative Cloud(opens in new tab) (creativebloq.com)
- In this case, 100% of readers who voted found the article helpful, earning it our reader-approved status. (wikihow.com)
External Links
How To
How to capture pictures under low lighting conditions
Low-light photography can be defined as taking photos in dimly lit and dark environments. It requires special equipment. Controlling exposure, white balance, sharpness, and contrast are the main challenges. There are two types low-light photography: ambient and flash. Flash photography works well when you have enough light. A flash is required if there isn’t enough light. If your subject is outdoors but indoors, you might not have enough light to take a great picture without a flash. Try shooting at night, during the moonlit hours, if you don't need a flash. This will allow you to get nice shadows and colors. Another option is shooting at twilight. Twilight occurs when there is still daylight but the sun has set.
Long exposures may be something you want to explore. Long exposures let you capture images even after the shutter has been open several minutes. The camera records only light falling on the sensor if it is kept closed. This light falls onto the sensor even after a long exposure. The shutter was not opened, so no new light entered the lens. As a result, you see very little movement. To ensure you're getting a clear image, turn off any automatic settings like autofocus and auto exposure. You should also adjust the ISO setting prior to you start taking photos. An ISO setting 200 gives you more control over how bright or dim your image appears. Next, click quickly on the shutter button to capture the shot. This will bring the shutter completely to a close. Hold the shutter button down for the final second. You can prevent any additional light entering your camera by holding the shutter button down. Once you have taken the image, wait for a few seconds before you release it. This allows the camera time to process the photo. While you wait, your photos will be displayed on your computer's screen. When you are happy with your photos, save them to the computer.